

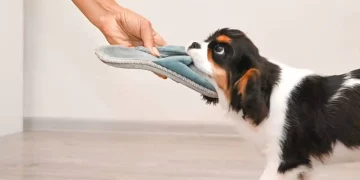


Trimming your pet’s nails is an essential part of their grooming routine. Overgrown nails can cause discomfort, pain, and even lead to mobility problems. However, cutting your pet’s nails requires careful attention, as cutting too short can cause bleeding and pain, while neglecting the task can lead to other health issues. To ensure that the nail-trimming process is safe, comfortable, and effective for both you and your pet, here are some important precautions to take:
1. Choose the Right Tools
The first step to successful nail trimming is selecting the right tools. Using inappropriate tools can cause discomfort or injury to your pet.
- Nail Clippers: There are different types of nail clippers available, such as scissor-style, guillotine-style, and grinder-style clippers. Choose the one that best suits your pet’s size and nail type.
- Scissor-style clippers are best for larger dogs or pets with thicker nails.
- Guillotine-style clippers are great for smaller pets or those with thinner nails.
- Nail grinders (similar to a Dremel tool) can be used to smooth the edges of the nails after trimming and are ideal for pets who are anxious about traditional clippers.
- Choose Quality Clippers: Make sure the clippers are sharp and durable. Dull clippers can crush the nail instead of cutting it, causing pain and discomfort. Replace your clippers regularly to ensure they are always effective.
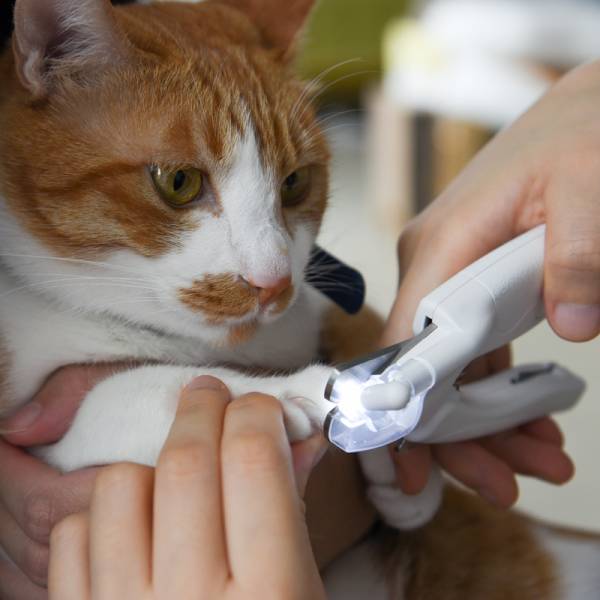
2. Know Where to Cut (Avoid the Quick)
One of the most important things to understand when trimming your pet’s nails is where to cut. The quick is a sensitive part of the nail that contains blood vessels and nerves. Cutting into the quick will cause bleeding and significant pain for your pet.
- How to Identify the Quick: The quick is typically visible as a pink or light-colored area inside the nail, particularly in pets with light-colored nails. For pets with dark nails, it can be more challenging to see the quick, so you should trim small amounts at a time to avoid hitting it.
- Trim Small Amounts at a Time: To avoid cutting into the quick, trim a small portion of the nail at a time. This is especially important for pets with dark nails, as it’s harder to gauge how far down you can trim. If you notice a small white or light area at the tip of the nail, this is typically safe to trim. Stop trimming as soon as you see a black dot in the center of the nail, as this indicates you are approaching the quick.
3. Handle Your Pet Gently
Trimming nails can be a stressful experience for both pets and owners, especially if your pet is anxious or not accustomed to having their nails trimmed. It’s important to handle your pet gently and patiently to prevent injury or undue stress.
- Start Slowly: If your pet isn’t used to nail trims, start by gently handling their paws and getting them accustomed to having their feet touched. Gradually move on to touching the nails and using the clippers without actually cutting anything. Once your pet is comfortable with the process, you can begin trimming.
- Stay Calm: Your pet can sense your emotions, so staying calm and relaxed will help them feel more at ease. If you’re nervous or frustrated, your pet may become more anxious or fidgety.
- Use Positive Reinforcement: Reward your pet with treats, praise, or petting after each successful trim. Positive reinforcement will help your pet associate nail trimming with good things, making the process easier next time.
4. Ensure Good Lighting and Proper Positioning
Proper lighting is essential for safely trimming your pet’s nails, as it allows you to see the nail clearly and avoid cutting too short. In addition, positioning yourself and your pet correctly will help make the process more efficient and reduce the risk of injury.
- Adequate Lighting: Make sure you have good lighting, preferably natural light or a bright lamp, so you can see the details of the nail and identify the quick clearly. If your pet has dark nails, good lighting will help you trim more confidently.
- Comfortable Positioning: Position your pet in a way that allows you to access their paws easily while keeping them calm and comfortable. For smaller pets, it’s often easiest to place them on your lap or a table. For larger pets, you may want to ask someone for assistance or use a pet grooming table.
5. Take Breaks When Needed
If your pet is anxious or fidgety, it’s a good idea to take breaks between trims to prevent stress. If you’re trimming all of your pet’s nails in one session, break the process into segments. Trim one or two nails, then stop and give your pet a break before continuing.
- Don’t Rush: Don’t try to trim all the nails in one go if your pet is particularly anxious. It’s better to take your time and do it in stages. If needed, trim a few nails today and finish the rest in a day or two.
- Calming Breaks: If your pet is showing signs of stress, such as heavy panting or trying to escape, give them a short break. Let them calm down before resuming the trimming.

6. Be Aware of Special Conditions (e.g., Dewclaws)
Some pets have special nails, such as dewclaws, which are located higher up on their legs, often near the wrist or ankle. Dewclaws can grow longer and are more prone to becoming caught or injured, so they should be trimmed regularly. Keep an eye out for these special nails and take extra care when trimming them.
- Dewclaws: Dewclaws may not wear down naturally like regular nails, so they may require more frequent trimming. Be cautious when trimming them as they are often closer to the skin and can be difficult to reach.
- Long Nails: If your pet’s nails are excessively long, they may have difficulty walking or may be more prone to breaking. Long nails can also cause discomfort or pain. In this case, regular trimming is essential to keep your pet’s nails at a manageable length.
7. Use Styptic Powder for Accidental Cuts
If you accidentally cut the quick and cause bleeding, it’s important to have styptic powder or a styptic pencil on hand. Styptic powder helps stop the bleeding by coagulating the blood, so you can continue the grooming session without causing further distress.
- How to Use Styptic Powder: If you cut the quick, immediately apply styptic powder to the tip of the nail by pressing it gently against the bleeding area. The bleeding should stop within a few moments. If the bleeding persists, you may need to apply more pressure or consult your vet.
8. Consult a Professional Groomer or Veterinarian if Necessary
If you’re unsure how to trim your pet’s nails or are concerned about cutting the quick, don’t hesitate to ask a professional groomer or veterinarian for help. They can demonstrate the proper technique and provide you with additional advice on trimming your pet’s nails safely.
- Professional Grooming: If your pet has a history of difficult or stressful nail trims, consider taking them to a professional groomer who is experienced in handling pets and trimming nails. Groomers are trained to handle nervous or squirming pets and can make the experience more comfortable for both you and your pet.
9. Nail Care After Trimming
After trimming your pet’s nails, it’s a good idea to check the nails for sharp edges or rough spots. If you’ve used clippers, you can smooth the edges with a nail grinder or a file to avoid scratching or discomfort.
- Nail Grinding: After clipping, you can use a nail grinder to smooth out sharp edges and round off the nails. This is particularly useful for pets that tend to scratch furniture or humans with their freshly trimmed nails.
- Keep an Eye on Nail Growth: Regularly check your pet’s nails and trim them as needed. Keeping nails at an appropriate length helps avoid health issues and discomfort.
Conclusion
Trimming your pet’s nails is an essential part of their grooming routine, but it requires careful attention to ensure that it’s done safely and comfortably. By using the right tools, handling your pet gently, trimming small amounts at a time, and being prepared for any accidents, you can make the nail trimming process less stressful for both you and your pet. Regular nail trims are key to maintaining your pet’s overall health and preventing long-term issues, so make it a routine part of their grooming schedule. If you’re unsure or need assistance, don’t hesitate to consult a professional groomer or veterinarian.


